Getting Started With Your New QM-1 Quick Mount Camera Support
Below are quick-start mounting instructions in three simple steps – or see the one-minute video
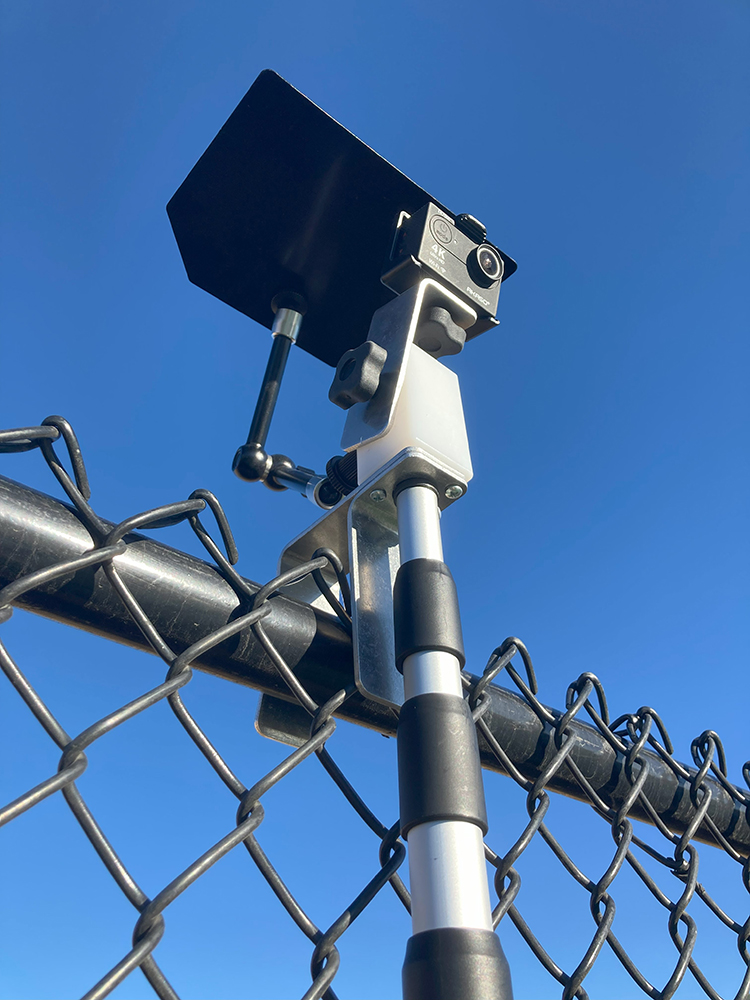
1. Make sure the camera bracket knob is tight before mounting your camera on the top of the movable Camera Holding Bracket. Then loosen the Camera Bracket Knob and angle the camera bracket to the first mark on the white plastic block holding bracket. (Once you’ve done this a few times, you rarely have to make any adjustments again.) Lightly tighten the Camera Bracket Knob one last time. DO NOT OVERTIGHTEN.
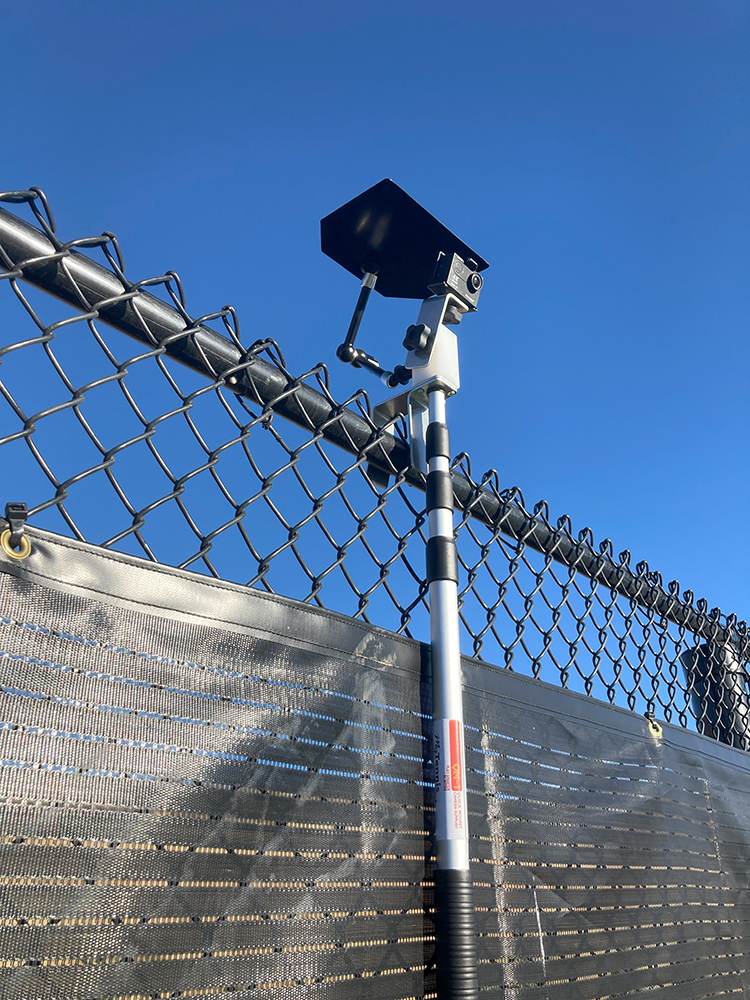
2. Lengthen the pole by twisting the black cuffs on the three sections of the extension pole counterclockwise. Then, twist the cuffs again but in a clockwise direction to tighten them when the pole is extended. Again DO NOT OVERTIGHTEN.
3. When placing your QM-1 on a fence for the first time, it may take a couple of tries to find the most secure spot for it. For an outdoor court mount, hook the aluminum brackets over both the horizontal rod and the fence fabric together. For an indoor court mount, position the backdrop curtain’s 1/4” cable between the QM-1’s extendable pole and the short aluminum leg on the QM-1, NOT in the big gap between the QM-1’s two legs.
That’s it, pretty simple!
Some Helpful Tips
1. Before leaving home, check that your camera battery is charged and that the zoom is set to a wide angle.
2. In the beginning, give yourself some extra time for set up so others aren’t waiting on you.
3. Experiment a little with where on the fence the QM-1 works best. Moving an inch to the left or right can make a big difference in the stability of the mount.
4. To make sure you get a true horizontal picture, look at the camera, not the extension pole, to see its level. You can’t always depend on a perfectly vertical pole to give a perfectly horizontal image.
5. You can skip this step later, but if you have a Wi-Fi camera, just check out the picture on your device to make sure it’s the right view you are looking for.
6. In some situations like high winds, a bungee cord strung horizontally across the bottom of the pole, or vertically from the bottom, can help stabilize the mount. You can also hang a water bottle from the bottom to weigh the pole down.
7. Be sure to check out our website at MyTennisTools.com from time to time for the latest products, and feel free to call anytime.
This product either alone, or in combination with other products, is available from www.MyTennisTools.com and from Mike Lammens, USPTA LLC.
The QM-1 is manufactured under United States Patent No. 8,152,389


Using your QM-1 with a phone adapter
Smartphones have wonderful cameras! As good or better than many stand alone cameras. When used with the wide angle lens, it covers the whole court in great detail. Many new phone have a wide angle lens built in so you may or may not need the additional wide angle lens accessory.
Here’s how to set it up:
- (If needed) Take out the wide angle lens, remove the protective caps, and attach the large clip to the lens.
- (If needed) Attach the assembly to your phone, centering over the camera my looking through the lens itself. It is very possible you can leave your phones protective cover on.
- Attach to the QM-1 Quick Mount using the provided adapter as shown here. It has a screw hole on the bottom and this keeps the camera from accidentally rotating.


0 Comments